Open topic with navigation
Barcode Rapid Check-in
The Bar Code Rapid Check-in search parameter allows a participant to completely bypass the
activity selection screen. If the participant has a previously been given a participant assignment
for the activity, Check-in simply displays a confirmation, or a name tag and/or parent receipts
prints depending upon how the activity was configured.
Barcode Rapid Check-in is a way to use a combination of self check-in and assisted check-in at
the same machine. Only those participants that do not have an assignment require a volunteer
to intervene and choose the correct location. All other participants are immediately checked in
(and a name tag/parent receipt will automatically print if the activity and/or room/location has
been configured to do so).
Tip! Bar Code Rapid Check-in is a great feature to use with your middle and high school
students who may not want to check-in and wear a name tag. Being able to scan a
barcode item such as a key chain tag or card may appeal to students.
Preparing for Barcode Rapid Check-in
To make Bar Code Rapid Check-in work properly, ensure the following conditions are
completed:
- The participant can be the only person associated with the barcode number. If
there is another person associated with the same barcode number, both names
appear in the search results and the Check-in greeter must select the correct
participant to complete the check-in.
- The participant must have an assignment for the activity in question. Participant
assignments can automatically be created the first time a participant attends an
activity if the activity has been configured to allow automatic assignments.
Participant assignments can also be entered manually. See the online help in
Fellowship One for instructions.
If these conditions are met, once the barcode number is scanned, the check-in is
complete and no additional selections need to be made.
Checking In
When the participant attends an activity/event, he/she can check in using the BarCode
Rapid Check-in feature.
To check in
- Ensure that you have associated a barcode number with an individual. Also ensure
that the participant you are using has a participant assignment for the activity.
Participant assignments are entered in Fellowship One (portal.fellowshipone.com).
See Participant Assignments for instructions on creating a participant
assignment.
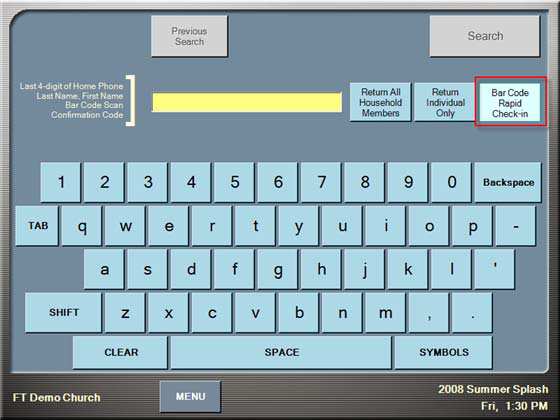
- Touch Search to display the Search screen if it is not already displayed.
- Touch the Bar Code Rapid Check-in button.

- Scan the barcode. The screen displays the number in the search field.
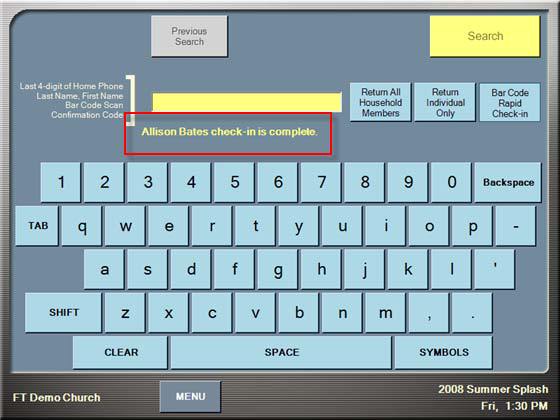
- Once the number has been verified, a confirmation appears as shown in the image
below. If the activity has been configured to print name tags and/or a parent tag, those will print.


